This where we add our database part of our addressbook web application. This part is actually pretty long so I am going to split it into two maybe three parts.
Let's get started...
We will be using a design pattern called Data Access Objects. We will inject this as a service, exposing it to the entire web application. We will also use Hibernate for this. This will further simplify our DAO approach. If you don't know or forgot what is a design pattern or even what is a DAO, educate yourself.
We already have all the pieces - we got the database, our webapp and our IDE - all we need is to use these pieces and work our DAO.
We begin by creating our hibernate.cfg.xml file. This file will connect us to our database where we created earlier at the beginning of this tutorial series. Where we put the file is defined by the file layout of our Tapestry5 web application. Now...
- Go to the Other Sources node of our project browser and locate the default package,
- Right-click select New and then Other.
- Look for the Hibernate folder and then select Hibernate Configuration Wizard.
- Just accept the defaults of the first two pages until you reach the third page of the wizard where you select the data source. Select New Database Connection and supply the details more or less like the screenshot.
- Open the hibernate.cfg.xml file if its not open(duh!) and locate Optional Properties
- Open that up and we will add two new properties
- The first property is the hibernate.show_sql (should be the first item in the combo box) and set it to true.
- The second one is to set hibernate.format_sql to true. This basically just pretty prints our sql statements into the console.
- Go to the Source Package create a new file.
- Now, this part will not make sense to you but just work with me. Go to Persistence and select Entity Classes from Database.
- Select the correct connection and select both tables.
- In the Entity Classes part modify the package name into edu.addressbook.entities. Don't about the project not having any persistence unit and make sure that the Generate named query annotations is check.
- In the Mapping Options there is one thing you need to decide on though, its the collection type. The collection type basically defines how you are going to handle rows of records containing data retrieved from the database. Now don't you wish you should have paid more attention to Sir Jay's class on data structures and algorithms class during college. Anyhow, I am selecting List for this tutorial but it doesn't really matter what you choose as long you know how to handle that data structure.
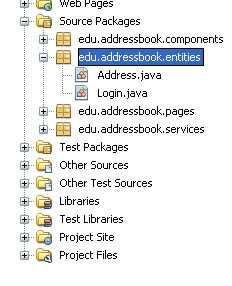
 You should be looking at something that looks like the screenshot #2 after finishing the wizard. If you look at the code inside the entities you should notice is basically a POJO with bits of annotations - lots of get and set methods.
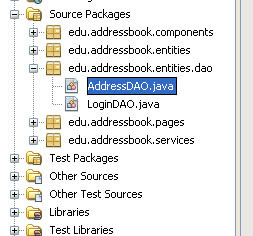
With that, we start creating our abstract interfaces for our DAO. Abstract interfaces in DAO are simply Java interfaces and we need two - one for the address entity and another one for the login entity.
Remember, Java interfaces contain "contract" methods that we implement somewhere else by implementing the interface. Here is the AddressDAO interface. There is If you notice the methods are CREATE, RETRIEVE, UPDATE and DELETE hence CRUD applications. You can also change this to synonyms like create = add; retrieveAll = findAll, etc. You get the idea.
 public interface AddressDAO {
   public void create(Address newAddress);
   public List<Address> retrieveAll();
   public void update(Address address);
   public void delete(Address address);
 }

The LoginDAO interface has exactly the same contents. Just change the Address entities into Login entities. And don't forget to import the List interface from the java.util package.
Now stay tune for part 2....

No comments:
Post a Comment